Changing the Color and Width
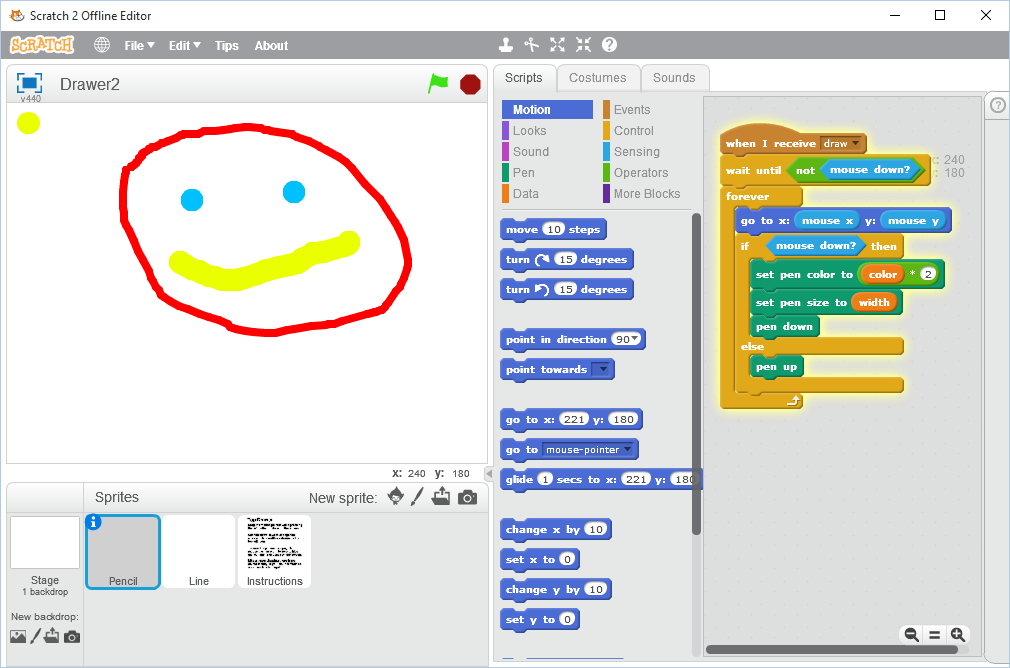
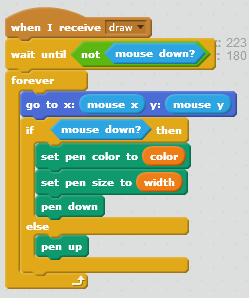
What we have is a mildly interesting app that draws red lines on the Scratch screen. However, we would also like to let the user change the line color and its width during the drawing process. There are several ways we can do this but they are severely limited by the fact that we also intend to allow the user to save the screen drawing. This means it will be difficult to add screen controls which would have to be removed before the screen capture process.
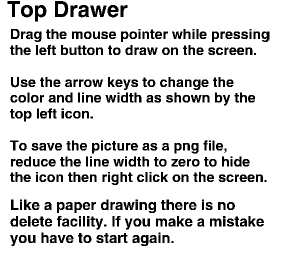
The strategy here is to draw a single dot in the top left corner of the screen and use this to indicate the current color and width then the user can remove it by reducing the width to zero before capturing the screen. It sounds complicated but is in fact a simpler approach than many of the alternatives.
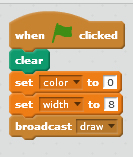
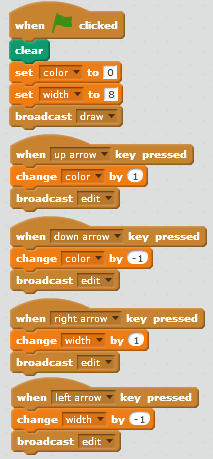
Then we can change the color and width by using the keyboard arrow keys for up, down, right and left. We can do this quite simply by adding blocks such as "When up arrow key pressed" to respond to the arrow keys. So there are four of these to increase and decrease the color and width. In each case we change the value by 1. We can let the Line sprite change the color and width variable values which will be automatically used by Pencil in drawing new lines. We create new messages, called edit, in the usual way and the result is a a set of new Stage scripts as shown in Figure 4.
Figure 4. The revised stage script.
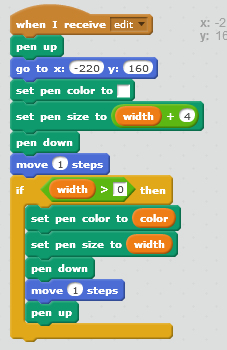
Now we have to write the Line script that responds to the edit message. It is started, of course, with a "When I receive edit" message then it raises the pen to move to some position in the top left corner of the screen where we will draw the line indicator. We will make this x=-220 and y=160 but you can change it, of course. We can set the pen color to the value of the color variable and its width to the value of width, either of which was incremented or decremented when the edit message was sent. Then we put the pen down and draw a line of length 1 step which roughly creates a circle. Then we lift the pen up to let the user move it away from the line indicator.
That should be enough to keep the indicator constantly updated but it isn't, of course. If you think about it - or try it - you will see that there is a problem. When the indicator size is increased, the circle increases just fine, but when it is decreased (by pressing the left key) it does not appear to shrink as it should. The reason is that the existing larger circle is still showing and concealing the new smaller circle. We need to delete the existing circle every time it is supposed to get smaller then redraw it. Deleting is not an option unless we record every step of the drawing process and repeat it without the last action. This can be done but a much easier way is to just redraw the indicator in the screen background color, which is white in our example, to cover up the old indicator.
So before we draw the new indicator we set the color to white and draw a slightly larger indicator to endure there are no edge effects. The white color is obtained from a "set pen color to box" block from the Pen palette. When you click on the box it is supposed to open a color chooser window but in Scratch 2 it does not. So you have to click on the box then move the selection pointer to the screen and click on that to select its color.
With that addition, the Line script is now as shown in Figure 5.
Figure 5. The Line script
