Color Graphics

From Bill's Tutorials at btutor.com

Color Methods

There are several ways to define a color in Java. The simplest is to use the color constants defined in the Color class, such as Color.RED and Color.YELLOW. These are very easy to use but they have a limited range. We can only have BLACK, BLUE, CYAN, DKGRAY, GRAY, GREEN, LTGRAY, MAGENTA, RED, TRANSPARENT, WHITE or YELLOW.

They are also quite unusual in two respects. First they are constants rather than variables so they named with all upper case letters. The value of Color.RED cannot change. Secondly, they are class data values rather than object values. There can be no objects of the Color class because there is only one set of colors. For example, a yellow color object would be the same as any other yellow color object. So they are class constants written with the class name and a capitalized value.

There is another way to define colors that gives us a lot more choice but is more difficult to use. This is based on the idea that any color can be constructed from a combination of red, green and blue components. We assign one byte of computer memory to each component. One byte is an 8 bit number that can have 256 different values from 0 to 255. Then we use three of these as a three byte integer number of which the left byte, that is the highest part of the number, is the red component, the next byte is the green component and the last byte is the blue component.

This gives us 16,777,216 colors. For example, we could specify a color by the integer 16,000,000. This is a very high number so it is some shade of red. Similarly, 65,000 would be a shade of green and 250 would be a bright blue. And 16,065,250 would be a mixture of these components.

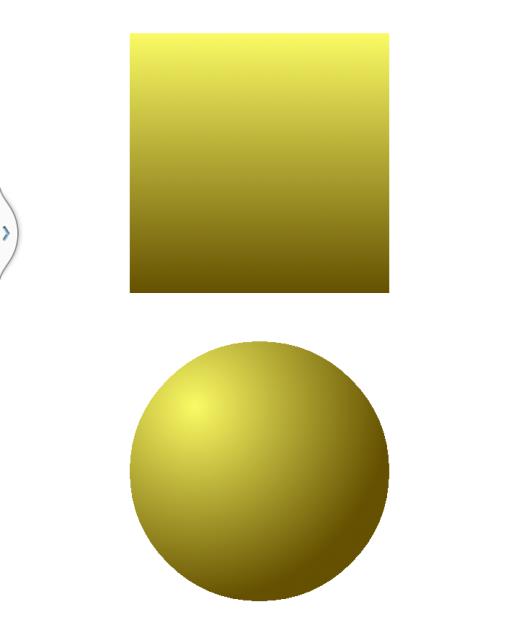
However, there is an easier and more precise way to use these numbers and that is to specify the three components as separate numbers from 0 to 255. Then 255, 0, 0 is the brightest red, 0, 255, 0 is the brightest green and 0, 0, 255 is the brightest blue. We might also have 255, 255, 255 which is white, 0, 0, 0 which is black and 100, 100, 100 which is gray. Some other examples are, 200, 200, 0 which is yellow, 200, 50, 0 which is orange, and 0, 100, 250 which is greenish blue.

The Color class provides methods that combine these components to make a complete color. It can also add a fourth component to specify the opaqueness or alpha component of the color. An alpha of 0 is totally transparent and a value of 255 is totally opaque with other values giving various degrees of partial transparency in between these extremes.

The methods are again class methods and are

Color.rgb(int red, int green, int blue) and
Color.argb(int alpha, int red, int green, int blue)

They can be used in Paint methods, for example,

paint,setColor(Color.rgb(int red, int green, int blue)) and
paint.setColor(Color.argb(int alpha, int red, int green, int blue))

So we are using a Paint method to run a Color class method to set the painting color. The Color method returns a color value which is then used as the argument in paint.setColor().

In passing, you might like to note that these components are sometimes expressed as hexadecimal numbers, such as ff0000, 00ff00 and 0000ff, but we can use the decimal notation in Android.

Color Gradient

We can also add color gradients to our shapes sometimes to give the impression of three dimensional objects. The most common gradients are linear gradients and radial gradients. They are defined by two classes, LinearGradient and RadialGradient. To use gradients we first have to create objects of these classes with all the data required to define the gradients then we use a paint method to set the gradient.

We can create a gradient object from these classes in the usual way. A linear gradient is created with,

LinearGradient linearGradient
= new LinearGradient(float x1, float y1, float x2, float y2, int c1, int c2, Shader.TileMode.mode )

This creates a gradient that changes along a straight line from the point x1, y1 to the point x2, y2. The starting color, at x1, y1 is c1 and the end color is c2. It will draw a series of lines across this path this fill the figure. It is illustrated in Figure 2 for a gradient from the top of a rectangle to the bottom where in this case the gradient starts and stops at the rectangle boundaries. We could draw the gradient path diagonally and we could start and terminate it inside or outside the rectangle.

The last parameter, Shader.TileMode.mode can have one of three values for mode, namely, CLAMP, MIRROR or REPEAT. The CLAMP constant ends the gradient and extends the final color if the gradient ends inside a shape. The MIRROR constant repeats the gradient as a mirror image, that is, in reverse. The REPEAT constant repeats the pattern. An example of the CLAMP is

LinearGradient linearGradient
= new LinearGradient(x1,y1,x2,y2, c1, c2,Shader.TileMode.CLAMP);

A radial gradient is also illustrated in Figure 2. This is declared and initialized in the same way as the linear gradient but requires different parameters. These are x and y the coordinates of the center of the gradient circle, radius, its radius and again, c1, c2 the start and end colors and the mode constant.

RadialGradient radialGradient =
new RadialGradient( float x, float y, float radius, int c1, int c2,
Shader.TileMode.mode)

Again x and y are the center point of the gradient and may not be the same as the center point of the shape that it fills. CLAMP will stop changing the color if the gradient terminates inside the shape, MIRROR will reverse the gradient and REPEAT will repeat it until the shape is filled.

In Figure 2 the center of the gradient is half a radius up and to the left of the center of the shape to produce a three dimensional highlighted effect with light coming from the top left direction. It is produced with code of the form

RadialGradient radialGradient =
new RadialGradient( x-r/2,  y-r/2, 3*r/2, c1, c2,
Shader.TileMode.CLAMP);

In this example, r is the radius of a circular figure being painted. The gradient starts at x-r/2, and y-r/2 and extends for a gradient radius of 3/r/2 to make sure it covers the whole shape.

Then we use the paint methods instead of the style and color methods,

paint.setShader(linearGradient)    or
paint.setShader(radialGradient)

linear and radial gradients
Figure 1. A linear gradient and a radial gradient

Traffic Lights

We can illustrate the use of the color methods and the gradients by drawing a set of traffic lights. They will be in the form of three circles in the usual red, orange and green arrangement each with a radial gradient. The lights are shown in a test configuration with all the lights on, but a state variable is provided that can be used to develop the application further and show the lights at stop, ready to go, go and ready to stop. In these states one or more of the lights will be in the off color.

Another feature of this application is that the graphics are devolved to a separate class. This is a better practice for complex graphics that may have to be maintained separately from the main activity.

We will develop a new app for this simulation and call it TrafficLights. The separate class is called LightsSo the complete app is as follows.

package com.androidjavaapps.trafficlights;

import android.os.*;
import android.app.*;
import android.view.*;
import android.content.*;
import android.graphics.*;

public class MainActivity extends Activity {

ShapeView shapeView;

@Override
protected void onCreate(Bundle savedInstanceState) {
super.onCreate(savedInstanceState);
shapeView=new ShapeView(this);
setContentView(shapeView);
}

public class ShapeView extends View {
Lights lights;
float width, height;
float u;

public ShapeView(Context context){
super(context);
width = getResources().getDisplayMetrics().widthPixels;
height = getResources().getDisplayMetrics().heightPixels;
if (width<height) u=width/1000;
else u=height/1000;
float width=8*u;
this.setBackgroundColor(Color.BLACK);
float x=500*u;
float y=500*u;
float r=140*u;
int state=0;            // test state - all lights on
lights=new Lights(x,y,r,state);
}

public void onDraw(Canvas canvas){
lights.draw(canvas);
}
}
}

So the lights is declared as an instance variable in shapeView and its constructor is passed an x, y and radius, r, value to the Lights class along with the state value which here is 0 representing the test state with all lights switched on. The Lights class does all the graphics in its draw() method which is called from the onDraw() of shapeView passing a reference to the current Canvas object..

package com.androidjavaapps.trafficlights;

import android.graphics.*;

public class Lights {
float size, x, y, r;
int redon, redoff, amberon, amberoff, greenon, greenoff;
RadialGradient radialGradient;
Paint paint =new Paint();
int state;   // available for further development
public Lights(float xpos, float ypos, float rad, int lightstate) {
x = xpos;
y = ypos;
r = rad;
state=lightstate;
redon = Color.rgb(250,0,0);
redoff = Color.rgb(80,0,0);
amberon = Color.rgb(250,150,0);
amberoff = Color.rgb(80,40,0);
greenon = Color.rgb(0,250,0);
greenoff = Color.rgb(0,80,0);
}

public void draw(Canvas canvas){
y-=2*r;
radialGradient = new RadialGradient(x , y, r, redon, redoff, Shader.TileMode.CLAMP);
paint.setShader(radialGradient);
canvas.drawCircle(x, y, r, paint);
y += 2*r;
radialGradient = new RadialGradient(x, y, r, amberon, amberoff, Shader.TileMode.CLAMP);
paint.setShader(radialGradient);
canvas.drawCircle(x, y, r, paint);
y += 2*r;
radialGradient = new RadialGradient(x, y, r, greenon, greenoff, Shader.TileMode.CLAMP);
paint.setShader(radialGradient);
canvas.drawCircle(x, y, r, paint);
}
}

It uses six colors to represent the three “on” colors and the three “off” colors then draws the lights using gradients in which the on color is at the center and the off color at the periphery of each light. It is possible to develop the application further (and this will be done in a later tutorial) to draw the other states of the traffic lights with one or more lights based only on the periphery colors to show the “off” states.

The result of running this application is illustrated in Figure 2.

image of traffic lights
Figure 2. The Traffic Lights application with all lights on.